Angular2 系列教程(十)两种启动方法、两个路由服务、引用类型和单例模式的妙用

今天我们要讲的是 ng2 的路由系统。

例子

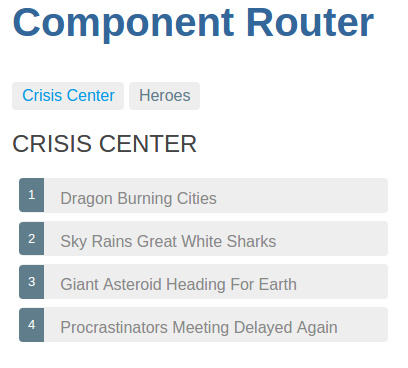
例子是官网的例子,包含一个”危机中心”和”英雄列表”,都在一个app中,通过路由来控制切换视图。还包含了Promise的用法,服务的用法等多个知识点。

源代码:

https://github.com/lewis617/angular2-tutorial/tree/gh-pages/router

运行方法:

在根目录下运行:

1
http-server

引入库文件设置base href

路由并不在ng2中,需要我们额外引入,另外我们需要设置base href,这是个什么东西呢?相当于我们后续所有 URL 的”前缀”,因为我们的app默认是基于HTML 5 pushState 风格的路由,所以我们需要加上base href,来保证当我们导航到深层次的 URL 时候,资源可以被正确加载:

index.html

1
2
3
4
5
6
<!-- Add the router library -->
<script src="lib/router.dev.js"></script>

<!-- Set the base href -->
<script>document.write('<base href="' + document.location + '" />');</script>

两种启动方法

app/main.ts

1
2
3
4
5
6
7
8
9
10
11
12
13
14
import {bootstrap}        from 'angular2/platform/browser';
import {ROUTER_PROVIDERS} from 'angular2/router';

import {AppComponent} from './app.component';

// Add these symbols to override the `LocationStrategy`
//import {provide} from 'angular2/core';
//import {LocationStrategy,
// HashLocationStrategy} from 'angular2/router';

bootstrap(AppComponent, [ROUTER_PROVIDERS,
//provide(LocationStrategy,
// {useClass: HashLocationStrategy}) // .../#/crisis-center/
]);

这种启动方法采取默认的 HTML 5 pushState 风格,没有#号,但是存在一个弊端。就是当我们在子路经刷新浏览器时候,会出现404的错误。解决办法可以将所有的路由都指向根目录,但是我们使用了http-server,显然不太方便设置。 (可以通过设置base href为“/“来解决!)所以还有另外一种风格,就是老式风格,和ng1一样的,带有#的路由风格,它的启动方法是:

1
2
3
4
5
6
7
8
9
10
11
12
13
14
15
import {bootstrap}        from 'angular2/platform/browser';
import {ROUTER_PROVIDERS} from 'angular2/router';

import {AppComponent} from './app.component';

// Add these symbols to override the `LocationStrategy`
import {provide} from 'angular2/core';
import {LocationStrategy,
HashLocationStrategy} from 'angular2/router';

bootstrap(AppComponent, [ROUTER_PROVIDERS,
provide(LocationStrategy,
{useClass: HashLocationStrategy}) // .../#/crisis-center/
]);

如此一来,我们的app的路由就全部带上#了,当你刷新页面时候,也不会出现404的错误了,但是url的可读性没有 HTML 5 pushState 风格好看。

ROUTER_DIRECTIVES、RouteConfig、routerLink、router-outlet

路由的编写很简单,我们只需要在我们的组件中进行配置就行了:

app/app.component.ts

1
2
3
4
5
6
7
8
9
10
11
12
13
14
15
16
17
18
19
20
21
22
23
24
25
26
27
28
29
30
31
32
33
34
35
36
37
import {Component} from 'angular2/core';
import {RouteConfig, ROUTER_DIRECTIVES} from 'angular2/router';

import {CrisisCenterComponent} from './crisis-center/crisis-center.component';
import {HeroListComponent} from './heroes/hero-list.component';
import {HeroDetailComponent} from './heroes/hero-detail.component';

import {DialogService} from './dialog.service';
import {HeroService} from './heroes/hero.service';

@Component({
selector: 'my-app',
template: `
<h1 class="title">Component Router</h1>
<nav>
<a [routerLink]="['CrisisCenter']">Crisis Center</a>
<a [routerLink]="['Heroes']">Heroes</a>
</nav>
<router-outlet></router-outlet>
`,
providers: [DialogService, HeroService],
directives: [ROUTER_DIRECTIVES]
})
@RouteConfig([

{ // Crisis Center child route
path: '/crisis-center/...',
name: 'CrisisCenter',
component: CrisisCenterComponent,
useAsDefault: true
},

{path: '/heroes', name: 'Heroes', component: HeroListComponent},
{path: '/hero/:id', name: 'HeroDetail', component: HeroDetailComponent},
{path: '/disaster', name: 'Asteroid', redirectTo: ['CrisisCenter', 'CrisisDetail', {id:3}]}
])
export class AppComponent { }

上述代码我们干了几件事:

  1. 写了一个组件,包含一个h1,一个nav里面包含两个a,还有一个router-outlet组件
  2. 注入了两个服务,DialogService, HeroService(这一步不属于路由构建步骤)
  3. 注入了一个指令,ROUTER_DIRECTIVES
  4. 使用@RouteConfig,配置子路径和对应的子组件,当/crisis-center/时候,在router-outlet中显示CrisisCenterComponent组件,当/heroes时候,在router-outlet中显示HeroListComponent组件,以此类推
  5. 当导航到/disaster,重定向到CrisisCenterCrisisDetail视图。CrisisCenter, CrisisDetail是父子视图关系,下面会讲到。
  6. 导出这个组件

好了我们的带有路由的组件编写好了,其实就是个可以切换视图的组件而已,就是这么简单。我们在浏览器中运行程序,点击nav中的heroes,就可以把子视图Heroes渲染出来了。
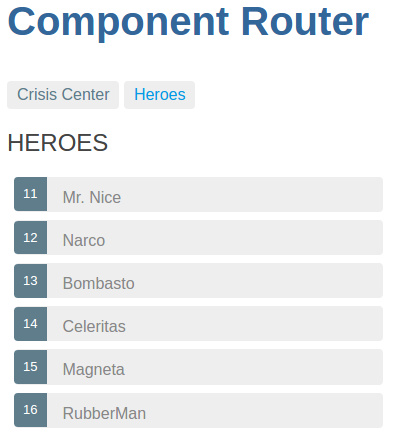
浏览器路径变为

http://localhost:63342/angular2-tutorial/router/index.html/heroes

在原有的基础上加上了/heroes。

温习promise

当我们导航到heroes视图的时候,我们就进入了另一个子组件,这个组件需要一个heroes服务,里面用到了Promise,我们在Angular2 系列教程(七)Injectable、Promise、Interface、使用服务讲过Promise,然我们来温习Promise:

app/heroes/hero.service.ts

1
2
3
4
5
6
7
8
9
10
11
12
13
14
15
16
17
18
19
20
21
22
23
24
25
26
import {Injectable} from 'angular2/core';

export class Hero {
constructor(public id: number, public name: string) { }
}

@Injectable()
export class HeroService {
getHeroes() { return heroesPromise; }

getHero(id: number | string) {
return heroesPromise
.then(heroes => heroes.filter(h => h.id === +id)[0]);
}
}

var HEROES = [
new Hero(11, 'Mr. Nice'),
new Hero(12, 'Narco'),
new Hero(13, 'Bombasto'),
new Hero(14, 'Celeritas'),
new Hero(15, 'Magneta'),
new Hero(16, 'RubberMan')
];

var heroesPromise = Promise.resolve(HEROES);

以上代码我们干了几件事:

  1. 写了一个Hero

  2. 写了一个HeroService类,包含两个成员函数

  3. 写了一个数组HEROES,里面每一项都是一个hero类的实例,也就是个对象(引用类型)

  4. 定义了一个heroesPromise,将value设为数组HEROES,状态为resolved,随时可以使用then来获取value,也就是数组HEROES

温习Promise,Promise的两种构建方法:

  1. Promise.resolve()
  2. new Promise(),里面是个function,该function的参数是resolve和reject。

例子(chrome console):

更详细的的用法,可以看我之前讲的Promise:Angular2 系列教程(七)Injectable、Promise、Interface、使用服务

两个服务:Router、RouteParams

我们的英雄服务写好了,然我们继续看英雄列表组件,当我们想要点击列表的某一项的时候,我们需要一个参数来导航到指定的英雄详情视图,这时候我们就需要RouteParams了,导航这个动作出发则需要Router服务:

app/heroes/hero-list.component.ts

1
2
3
4
5
6
7
8
9
10
11
12
13
14
15
16
17
18
19
20
21
22
23
24
25
26
27
28
29
30
31
32
33
34
35
36
37
38
39
40
41
    

// TODO SOMEDAY: Feature Componetized like CrisisCenter
import {Component, OnInit} from 'angular2/core';
import {Hero, HeroService} from './hero.service';
import {Router, RouteParams} from 'angular2/router';

@Component({
template: `
<h2>HEROES</h2>
<ul class="items">
<li *ngFor="#hero of heroes"
[class.selected]="isSelected(hero)"
(click)="onSelect(hero)">
<span class="badge">{{hero.id}}</span> {{hero.name}}
</li>
</ul>
`
})
export class HeroListComponent implements OnInit {
heroes: Hero[];

private _selectedId: number;

constructor(
private _service: HeroService,
private _router: Router,
routeParams: RouteParams) {
this._selectedId = +routeParams.get('id');
}

isSelected(hero: Hero) { return hero.id === this._selectedId; }

onSelect(hero: Hero) {
this._router.navigate( ['HeroDetail', { id: hero.id }] );
}

ngOnInit() {
this._service.getHeroes().then(heroes => this.heroes = heroes)
}
}

以上代码,我们干了几件事:

  1. 渲染一个组件,包括一个列表
  2. 在构造函数中,将英雄服务HeroService、路由服务Router、路由参数RouteParams传给私有变量
  3. 写了三个成员函数用于处理相应的业务逻辑
  4. 其中this._router.navigate( ['HeroDetail', { id: hero.id }] );app导航到了HeroDetail视图,并带上id参数
  5. 其中this._service.getHeroes().then(heroes =&gt; this.heroes = heroes),用于获取刚才的heroes数组,并将其传给this.heroes

Router服务的使用:

1
this._router.navigate( ['HeroDetail', { id: hero.id }] );

RouteParams服务的使用:

1
this._selectedId = +routeParams.get('id');

其中routeParams.get('id')前面那个+代表将其转换为数字类型。

HeroService服务的使用:

1
this._service.getHeroes().then(heroes =>; this.heroes = heroes)

引用类型和单例模式的妙用

我们继续看英雄详细视图:

app/heroes/hero-detail.component.ts

1
2
3
4
5
6
7
8
9
10
11
12
13
14
15
16
17
18
19
20
21
22
23
24
25
26
27
28
29
30
31
32
33
34
35
36
37
38
39
40
41
42
import {Component,  OnInit}  from 'angular2/core';
import {Hero, HeroService} from './hero.service';
import {RouteParams, Router} from 'angular2/router';

@Component({
template: `
<h2>HEROES</h2>
<div *ngIf="hero">
<h3>"{{hero.name}}"</h3>
<div>
<label>Id: </label>{{hero.id}}</div>
<div>
<label>Name: </label>
<input [(ngModel)]="hero.name" placeholder="name"/>
</div>
<p>
<button (click)="gotoHeroes()">Back</button>
</p>
</div>
`,
})
export class HeroDetailComponent implements OnInit {
hero: Hero;

constructor(
private _router:Router,
private _routeParams:RouteParams,
private _service:HeroService){}

ngOnInit() {
let id = this._routeParams.get('id');
this._service.getHero(id).then(hero => this.hero = hero);
}

gotoHeroes() {
let heroId = this.hero ? this.hero.id : null;
// Pass along the hero id if available
// so that the HeroList component can select that hero.
// Add a totally useless `foo` parameter for kicks.
this._router.navigate(['Heroes', {id: heroId, foo: 'foo'} ]);
}
}

上述代码,我们仅仅是获取指定的英雄信息,并渲染出来。那么修改英雄信息是如何实现的呢?就是通过引用类型实现的。

我们知道,在js中,对象和数组是引用类型,也就意味着,当我们将某个对象传给别的变量的时候,仅仅是将对象的地址传给了那个变量,当我们修改那个变量时候,其实对象也被修改了。
在这个程序中,我们将hero对象传给this.hero,并将其双向数据绑定到input上:

1
<input [(ngModel)]="hero.name" placeholder="name"/>

这样当我们改变input的值的时候,this.hero被改变,服务中的hero也被改变,因为是引用类型嘛,其实操作的都是一个对象。再有我们的服务是单例模式,所以全局的hero列表都被改变了。

让我们改变input的值,并点击back,我们发现英雄列表视图中的数据也被改变了,这就是引用类型和单例模式的妙用。

Route Parameters or Query Parameters?

当我们点击back返回时候,我们发现URL变成了:

http://localhost:63342/angular2-tutorial/router/index.html/heroes?id=11&foo=foo

也就是拥有了Query Parameters:?id=11&amp;foo=foo

为何会这样呢?因为我们指定了参数:

1
this._router.navigate(['Heroes', {id: heroId, foo: 'foo'}]);

但是英雄列表视图有没有指定的idfoo的token,所以这两个变量是可选的,所以就自动生成了Query Parameters,好让我们进行select的css重绘。

在英雄详细视图中,我们使用了:id这个token。

1
{path: '/hero/:id', name: 'HeroDetail', component: HeroDetailComponent}  

这就是Route Parameters。它是必须的,我们必须要指定id这个参数。这就是Route Parameters 和 Query Parameters的比较。

这节课我们先讲到这里,下节课我们通过”危机中心”这个例子,继续讲解路由,将包含路由的嵌套、路由的生命周期等众多炫酷功能!


教程示例代码及目录

示例代码:https://github.com/lewis617/angular2-tutorial

目录:http://www.liuyiqi.cn/tags/Angular2/