今天,我们要讲的是structural directives和组件生命周期这两个知识点。structural directives顾名思义就是改变dom结构的指令。著名的内建结构指令有ngIf,ngSwitch 和ngFor。
例子
例子是我自己改写的,编写一个structural directives,然后通过这个指令实例化和注销组件,在此同时监视组件生命周期。
UnlessDirective
这个指令是官网示例中的指令。
app/unless.directive.ts
1 | import {Directive, Input} from 'angular2/core'; |
通过注入TemplateRef, ViewContainerRef这两个服务,来控制template的实例化和注销。TemplateRef可以让我们获取指令所在的元素的template,ViewContainerRef提供了多种视图容器的方法。
更详细的介绍:
用于测试的组件
接下来我们编写一个用于测试的组件。
app/lifecycle.ts
1 | import {Component,Input} from 'angular2/core'; |
这段代码我们做了这些事:
- 渲染一个
span一个button - 设置成员变量
name,@input代表从parent输入 - 设置成员函数
doSomething,打印一个信息,执行一个异步操作setTimeout - 继承接口,设置所有的生命周期钩子,并打印信息
我们将使用这个组件,来监视组件生命周期。
使用指令控制组件
我们将我们的组件渲染出来,并用我们编写的结构指令”myunless”去实例化和注销这个组件
app/app.ts
1 | import {Component} from 'angular2/core'; |
这段代码我们干了这些事:
- 注入组件和指令
directives:[UnlessDirective,Lifecycle] - 渲染一个
button控制成员变量condition的正负 - 渲染我们的组件
lifecycle,并使用指令控制它的实例化和注销<lifecycle *myUnless=”condition” name=”lewis”></lifecycle> - 最后启动这个
app组件bootstrap(App, []) .catch(err => console.error(err));
开始测试
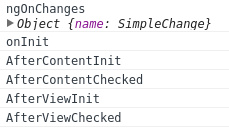
刷新页面:
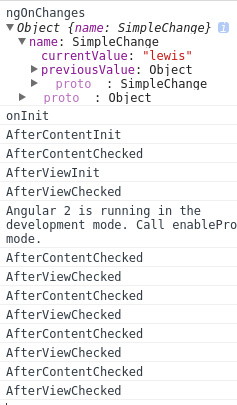
onInit是在组件第一次ngOnChanges时执行OnChanges在input和output绑定的值变化时候;我们可以看到打印了变化的值。可以替代ng1中的$watch;AfterContentInit、AfterViewInit分别代表在组件内容和视图初始化后执行。AfterContentChecked和AfterViewChecked是在组件内容和视图检查完后执行。
这里没有DoCheck,因为接口没有证实。
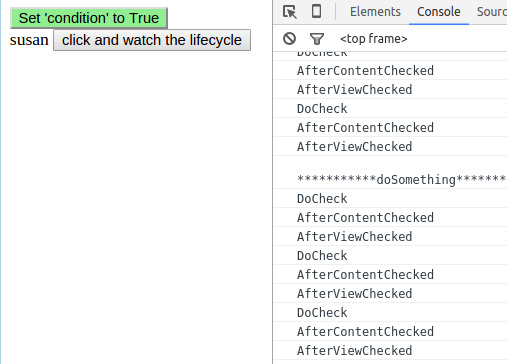
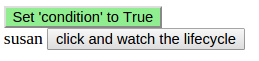
点击Set ‘condition’ toTrue按钮,页面上的组件被注销
console打印:

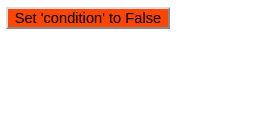
点击Set ‘condition’ to False按钮,页面上的组件重新被实例化:
console打印:
打印了一次Onchanges、onInit、AfterContentInit、AfterViewInit、AfterContentChecked和AfterViewChecked,说明组件实例化,只需要触发一轮初始化和变化检查。与刷新页面的五次对比,我们可以知道多余的”变化检查”,可能来源于angualr的启动。
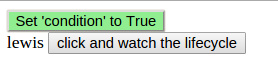
点击click and watch the lifecycle按钮,一秒后页面上的name变为susan:
console打印
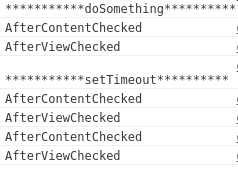
先打印一次AfterContentChecked和AfterViewChecked,一秒后又打印两次。OnChanges没有触发。
结论和收获
TemplateRef,ViewContainerRef这两个服务可以帮助我们实现结构指令的编写- 结构指令可以完全注销组件,节约性能消耗
- 组件实例化,只需要触发一轮初始化和”变化检查”
- angualr的启动会触发多次”变化检查”
- 我们可以继承
OnChanges接口,来实现类似ng1中的$watch功能,获取变化前后的值,但是只能监视@input装饰的变量 - ng2使用
zone,将window对象上常见的异步方法(setTimeout等),都打上了”猴子补丁”,使其可以直接更新视图,我们再也不用在异步中写ng1中的$apply了 - 我们可以使用
setTimeout(()=>{},0),在浏览器的一轮”event loop”后来触发ng2的”变化检查” - 我们触发类的成员函数(
doSomething)时,也会导致ng2的”变化检查”
教程示例代码及目录
示例代码:https://github.com/lewis617/angular2-tutorial